

chopper
0
- Joined
- Sep 21, 2008
- Messages
- 119
- Points
- 18
In order to hold myself over until flexdrives are available again I've been looking for a host to be able to use with an 803t and primary batteries. I don't really want to mess with unprotected 10440's so it's been hard trying to find a host that I can get 8-9V out of. Today at target I came across a Dorcy 6W LED that takes 6 AAA!!!
Now it's built (almost perfect) and I have my first DIY handheld!")
Pictures to come whence tomorrow when I have time.
This host did take a bit of rigging to get it up and running. The 6 AAA pack wires the batteries as two parallel sets of three for 4.5V. I snipped a couple of connections and soldered couple jumpers to put them all in series...9V check.
The LED driver is on the side button switch board. The switch itself is momentary, so something in the driver makes it stay on/off. It's actually wired kinda funny. I just desoldered all the components except the switch and attached the switch to the positive from battery. After almost melting the batteries together I realized the the original wiring of the switch created a short the way I had connected it. I had to remove two of the switch's pins from the board in order to remove the short. To get power to my Aixiz with rckstr driver inside I just cut the LED off of it's board and connected to the + and - terminals there (similar to Jayrob's MXDL side button tutorial).
To mount the diode I used one of Jayrob's MXDL side button heatsinks. This is the part I'd like to make better as the heatsinks are nowhere near big enough. To mount the heatsink I took the removed mirror and lens, cut the center of the lens out so only the portion around the mirror remained. I then cut the bottom of the mirror off and reinserted it upside down. This squeezes the heatsink in place.
It's pretty big and te host was ~$35, but I had become impatient. I set the rckstr to a conservative 105mA and it's working real good!!!
Pictures and more details to follow (probably tomorrow).
Edit: OK, Here are the pics!!
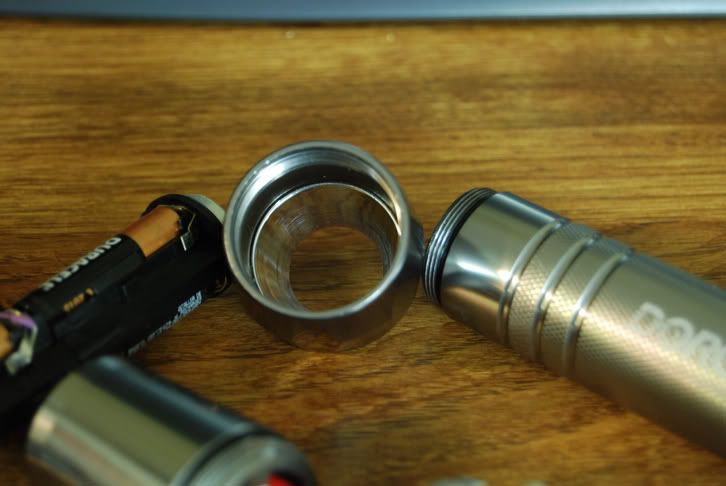
This host is pretty big! 8" (20.5 cm) tip to tail:


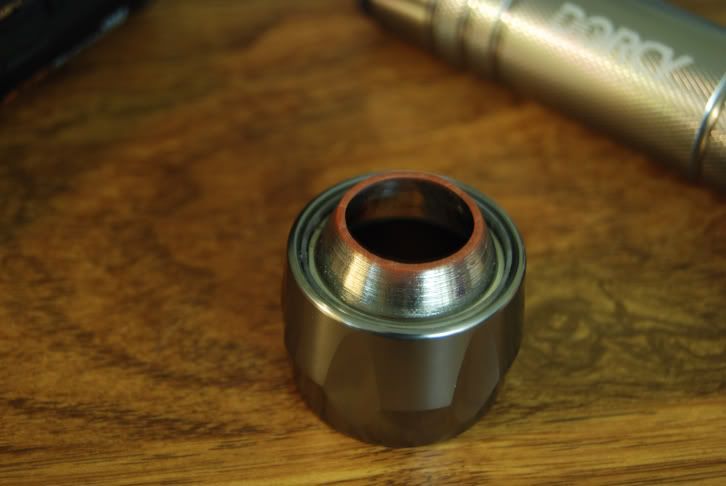
I removed the reflector and cut it so it's a little wider than the Jayrob MXDL side button heatsink I have.
I cut the lens so that the only remaining bit of it is on the outside of the reflector (so it fit snug like it originally did). It was then inserted backwards. This is the biggest flaw of this build to me, this method of holding in the heatsink leaves a pocket of air completely around it. The reflector is plastic so the only metal the heatsink contacts is the at the base. There's no lip or ridge to hold a properly sized heatsink in so I don't know how to make it better right now.
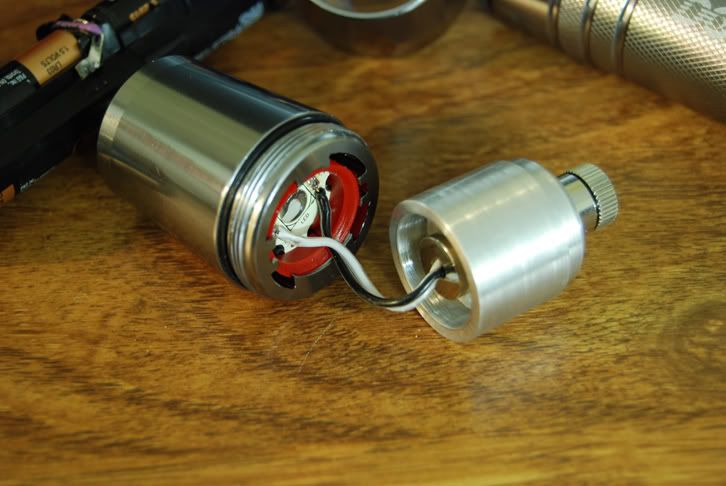
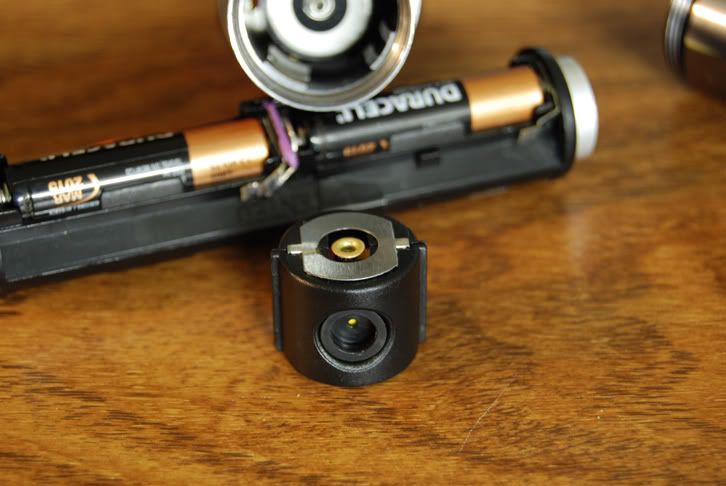
Here is the heatsink wired to the old contacts from the LED. I cut out the original LED as you would in the Jayrob MXDL side button tutorial. (http://www.laserpointerforums.com/forums/YaBB.pl?num=1217045236)
This is a seperate board and insert than the LED driver.
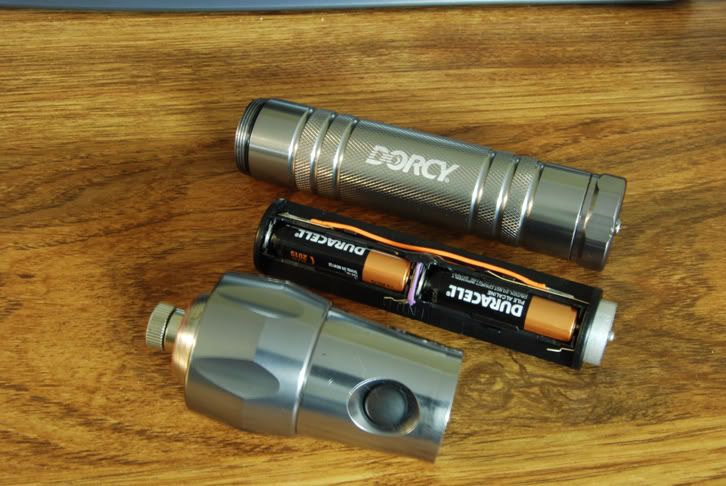
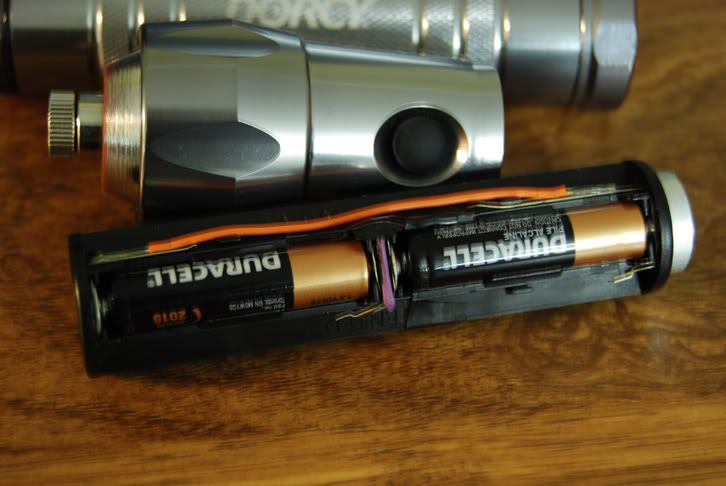
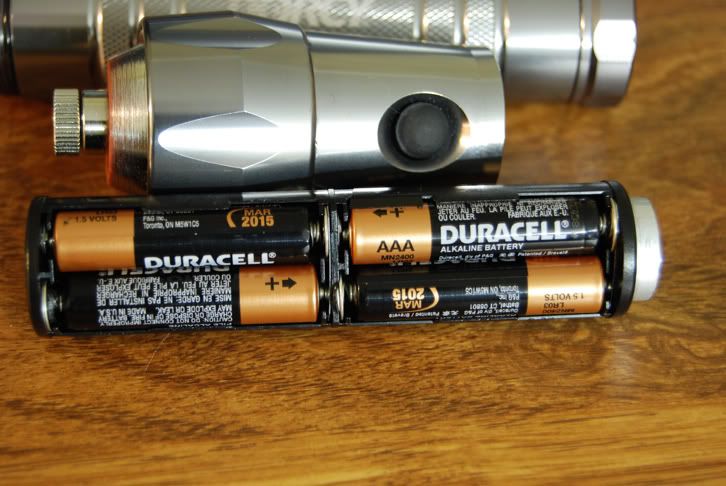
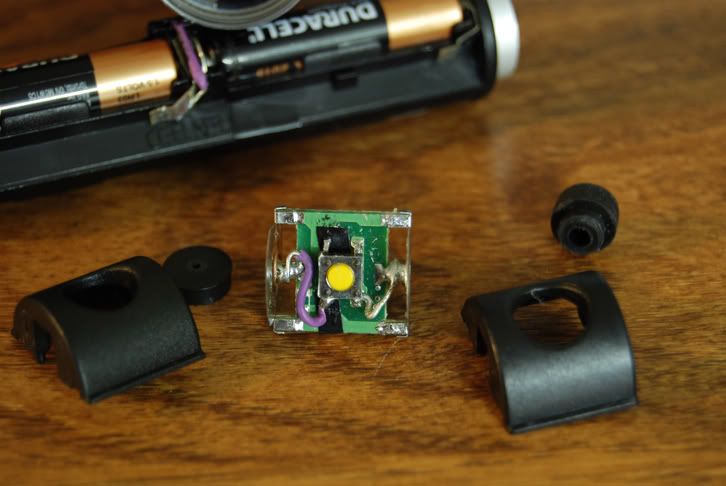
Here's the 6xAAA battery pack. It's rewired so it's 9V instead of the parallel 4.5V it comes with. Out of the package the 3 at each end are grouped in series then wired in parallel to the other 3. I snipped the contact in a way to make all six in series by adding the orange and purple jumper wires.
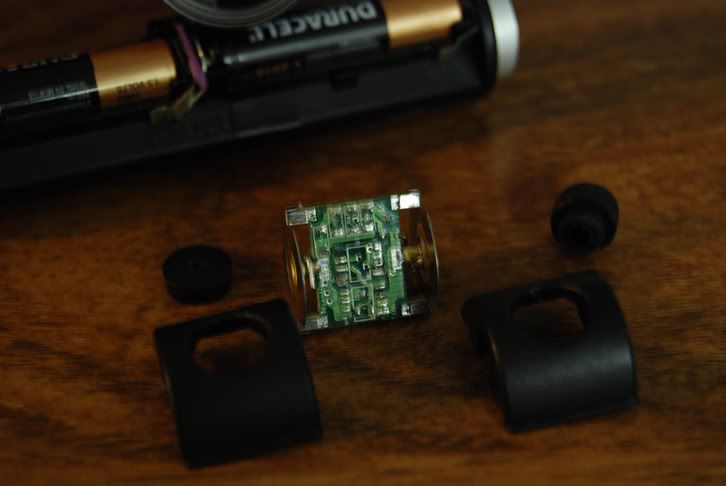
This is the LED driver/switch housing. To remove this I pulled the push button out with my fingers. It then slides out the battery side of the midsection. It has "fins" on each side which fit into grooves in the midsection body. The housing opens by wedging a small flat head into the seam. It's not glued so it popped apart real easy. I almost lost the bottom half of the push button which just rests on top of the switch inside the housing.
Original driver board with all component removed:
The modded momentary switch board (back of original driver board):
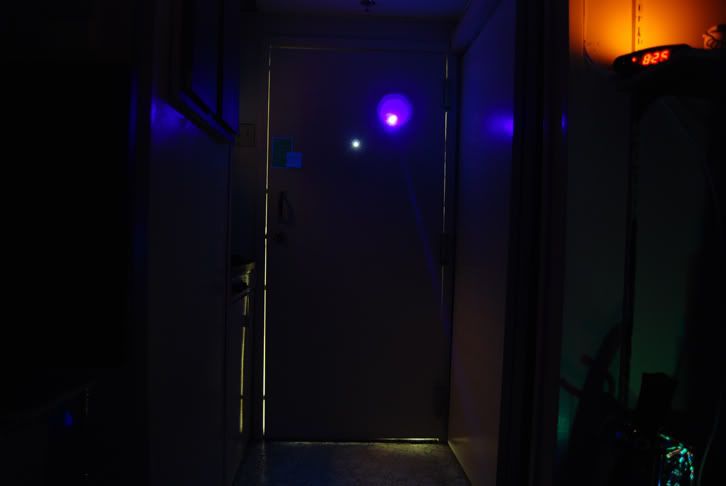
Here's a dim beam shot...
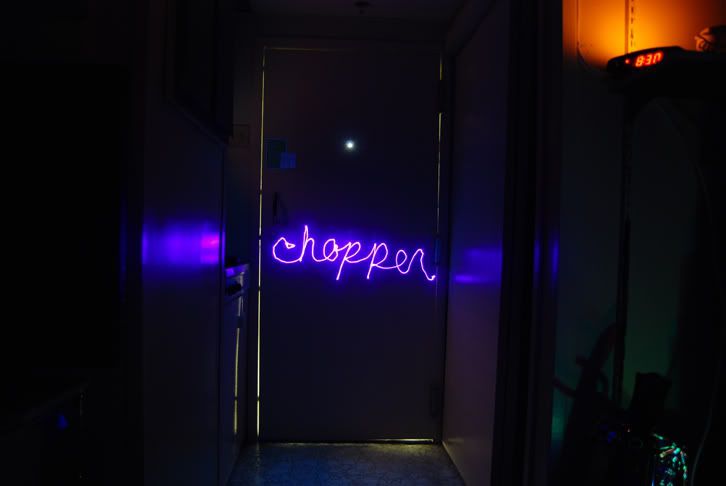
And I made an image for my avatar or sig...
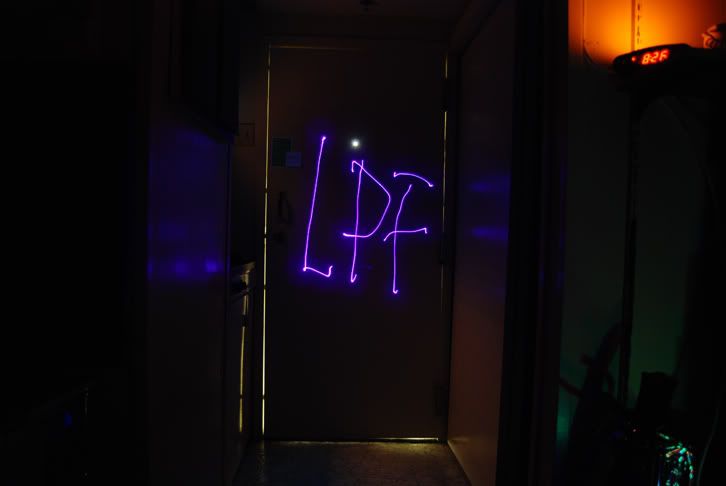
And an LPF tag:
Now it's built (almost perfect) and I have my first DIY handheld!
Pictures to come whence tomorrow when I have time.
This host did take a bit of rigging to get it up and running. The 6 AAA pack wires the batteries as two parallel sets of three for 4.5V. I snipped a couple of connections and soldered couple jumpers to put them all in series...9V check.
The LED driver is on the side button switch board. The switch itself is momentary, so something in the driver makes it stay on/off. It's actually wired kinda funny. I just desoldered all the components except the switch and attached the switch to the positive from battery. After almost melting the batteries together I realized the the original wiring of the switch created a short the way I had connected it. I had to remove two of the switch's pins from the board in order to remove the short. To get power to my Aixiz with rckstr driver inside I just cut the LED off of it's board and connected to the + and - terminals there (similar to Jayrob's MXDL side button tutorial).
To mount the diode I used one of Jayrob's MXDL side button heatsinks. This is the part I'd like to make better as the heatsinks are nowhere near big enough. To mount the heatsink I took the removed mirror and lens, cut the center of the lens out so only the portion around the mirror remained. I then cut the bottom of the mirror off and reinserted it upside down. This squeezes the heatsink in place.
It's pretty big and te host was ~$35, but I had become impatient. I set the rckstr to a conservative 105mA and it's working real good!!!
Pictures and more details to follow (probably tomorrow).
Edit: OK, Here are the pics!!
This host is pretty big! 8" (20.5 cm) tip to tail:
I removed the reflector and cut it so it's a little wider than the Jayrob MXDL side button heatsink I have.
I cut the lens so that the only remaining bit of it is on the outside of the reflector (so it fit snug like it originally did). It was then inserted backwards. This is the biggest flaw of this build to me, this method of holding in the heatsink leaves a pocket of air completely around it. The reflector is plastic so the only metal the heatsink contacts is the at the base. There's no lip or ridge to hold a properly sized heatsink in so I don't know how to make it better right now.
Here is the heatsink wired to the old contacts from the LED. I cut out the original LED as you would in the Jayrob MXDL side button tutorial. (http://www.laserpointerforums.com/forums/YaBB.pl?num=1217045236)
This is a seperate board and insert than the LED driver.
Here's the 6xAAA battery pack. It's rewired so it's 9V instead of the parallel 4.5V it comes with. Out of the package the 3 at each end are grouped in series then wired in parallel to the other 3. I snipped the contact in a way to make all six in series by adding the orange and purple jumper wires.
This is the LED driver/switch housing. To remove this I pulled the push button out with my fingers. It then slides out the battery side of the midsection. It has "fins" on each side which fit into grooves in the midsection body. The housing opens by wedging a small flat head into the seam. It's not glued so it popped apart real easy. I almost lost the bottom half of the push button which just rests on top of the switch inside the housing.
Original driver board with all component removed:
The modded momentary switch board (back of original driver board):
Here's a dim beam shot...
And I made an image for my avatar or sig...
And an LPF tag:


