Welcome to Laser Pointer Forums - discuss green laser pointers, blue laser pointers, and all types of lasers

LPF Donation via Stripe | LPF Donation - Other Methods

Links below open in new window

ArcticMyst Security by Avery

Check my 6x build please! Update: It's Finished w/pics

Joined
Sep 22, 2010
Messages
1,358
Points
48
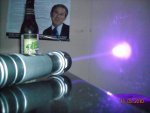
Ok before I solder this up permanently tomorrow and potentially fry my 6x diode I want to run this buy the knowledgeable folks here.

First here's the specs of the laser I'm building:

diode: 6x SF-AW210
driver: drlava microboost set to 180mA (get Flamingpyro's for this!)
power: 3xAAA NiMH until my 18650s $%^&(% arrive from DX.
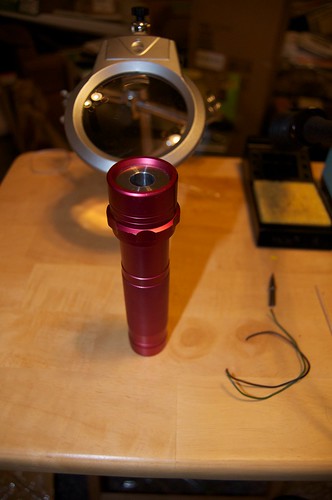
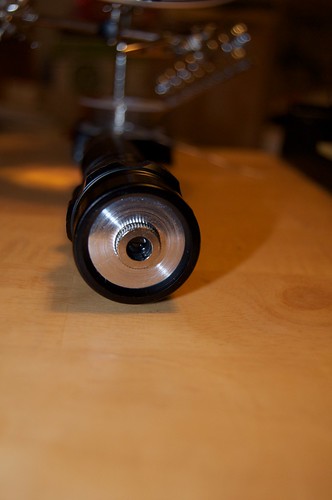
host: Mohernberg Guidesman 18650 Host+Heatsink these hosts are great and a *steal* at $20.

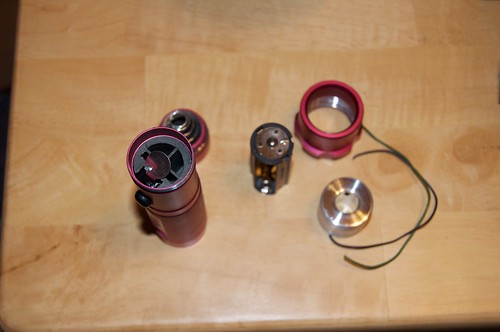
Here's what I've done so far:

Set the currant rage to 140-280mA per the manual on drlava's site.
Soldered leads to the battery +/-.
Soldered leads to the D+/-.

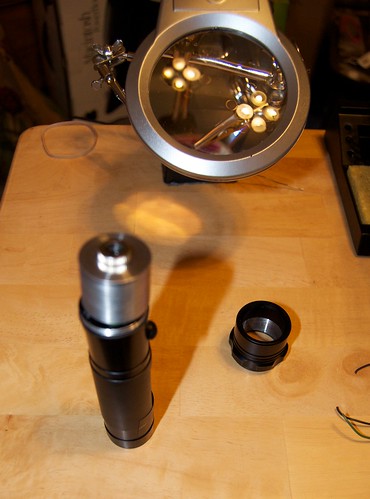
For a test load I used 6 1N4001 diodes in series along with a 1ohm 1W resistor to measure the current across.

Since the host is case negative and the microboost doesn't have a continuous ground I also need to run a separate lead from the case pin to the negative of the input side correct? The +/- pins of the LD connect to the +/- leads from the LD side of the driver as normal. The positive lead from the input side connects to the positive terminal in the pill.

I also wanted to make sure I set up the driver and test load correctly since I've never tested a microboost before. I connected LD+ lead to the first diode and the LD- lead to the resistor then measured the current across the resistor. I wasn't sure if I needed do something different due to the lack of a continuous ground between batt- and LD-.

Thanks!
 
Last edited:


Joined
Feb 5, 2008
Messages
6,252
Points
83
Re: Check my 6x build please!

Too much current, don't go over 170mA for good life. 180mA could be gambling.


With MicroBoost, unlike Flex, you MUST have input voltage lower than OUTPUT voltage.

All other info seems good and checked. Case pin to negative input, positive input to pill/spring -> eventually, battery +.

You're ready to go.

Just don't rush anything and you'll be fine. Perhaps also want to upgrade to glass lens for little bit more power later, plastic lens degrade fast under such power of violet lasers, as I've heard [Okay, read].
 
Joined
Sep 22, 2010
Messages
1,358
Points
48
Re: Check my 6x build please!

Thanks for the heads up about the current. I misread the info on the diode comparison thread. I'll hook up the microboost to my test load again and turn it down a bit. I also plan on getting a glass lens for it and the 815 based red I plan on building soon. Hopefully with a little luck I should have a working laser in a couple hours!
 
Joined
Feb 5, 2008
Messages
6,252
Points
83
Re: Check my 6x build please!

Thanks for the heads up about the current. I misread the info on the diode comparison thread. I'll hook up the microboost to my test load again and turn it down a bit. I also plan on getting a glass lens for it and the 815 based red I plan on building soon. Hopefully with a little luck I should have a working laser in a couple hours!
Just take your time, you can have plenty of time to play with laser after it's completed.

Tell us all about it, too.
 
Joined
Sep 22, 2010
Messages
1,358
Points
48
Re: Check my 6x build please!

Well it's together. I had to modify the stock pill to make the driver fit in it since I made my leads too long and there wasn't a snowball's chance hell I was going to desolder and shorten them. Got everything put together, took a deep breath, hit the switch and nothing. Double checked the battery pack and still nothing. *grumble* Took it apart and the wiring was still good so on a hunch I held the heatsink against the host and hit the switch. The diode springs to life and there's a nice purple oval on my wall. I carefully screwed the head of the flashlight back on and everything still worked. I suspect either the wires slipped between the heatsink and host or I just hadn't tightened it enough to establish ground. Of course I had to grab a match from the box on my desk and try to light it. I couldn't get it to even with the head colored black. I did notice it didn't seem much brighter then when I tested the diode at 43ma using my DDL breadboard driver. I know the eye isn't as sensitive to 405nm than say 445 or 532 but short of tearing the thing apart and hooking it back to the test load is there a way to test it assembled to make sure it's still drawing the 170ma I set it to? I'll post some pics later tonight.
 
Joined
Feb 5, 2008
Messages
6,252
Points
83
Re: Check my 6x build please!

Well it's together. I had to modify the stock pill to make the driver fit in it since I made my leads too long and there wasn't a snowball's chance hell I was going to desolder and shorten them. Got everything put together, took a deep breath, hit the switch and nothing. Double checked the battery pack and still nothing. *grumble* Took it apart and the wiring was still good so on a hunch I held the heatsink against the host and hit the switch. The diode springs to life and there's a nice purple oval on my wall. I carefully screwed the head of the flashlight back on and everything still worked. I suspect either the wires slipped between the heatsink and host or I just hadn't tightened it enough to establish ground. Of course I had to grab a match from the box on my desk and try to light it. I couldn't get it to even with the head colored black. I did notice it didn't seem much brighter then when I tested the diode at 43ma using my DDL breadboard driver. I know the eye isn't as sensitive to 405nm than say 445 or 532 but short of tearing the thing apart and hooking it back to the test load is there a way to test it assembled to make sure it's still drawing the 170ma I set it to? I'll post some pics later tonight.
You need to screw the lens outward a bit to create a focal point in the beam, and put match there, where beam is the thinnest.

It should light no problem.

If it does not ... big problems.

Also, put your finger in NON-focused beam (beam aproximately 4-5 mm wide). If you can feel the heat in about one second or less, it's good. If it takes longer than 3-4 seconds to feel the tingling sensation, then big problems again.

Also recheck current draw from the battery. Resistance between battery and driver can result in ackward behaviour as well.
 
Joined
Sep 22, 2010
Messages
1,358
Points
48
Re: Check my 6x build please!

Ok. I tried the "finger test" ranging in distances from about a foot to arm's length away and a couple of them took several seconds and a couple were almost instant to within a second or so.

*insert sound of needle scratching across a record*

I just realized the 3xAAA NiMHs I'm using until my 18650s and other stuff from DX arrives (This is day 19 since shipping IIRC) are probably pushing 9-10 years old and while they work in my flashlight the probably don't have the oomph to drive it at full power even when fully charged. I got some 1000mah that I use in my harmony remote that are only about a year or so old. I'm gonna pop them in the charger to top them off while at dinner and give them a try. The diode uses 4.8v which would be more than 3 fully charged NiMH which would be around ~4.2v

One last noob question if you don't mind. When you say check the current draw from the battery what do you mean? My DMM can measure up to 10A DC so should I set it to that and test the batteries?
 
Joined
Feb 5, 2008
Messages
6,252
Points
83
Re: Check my 6x build please!

Ok. I tried the "finger test" ranging in distances from about a foot to arm's length away and a couple of them took several seconds and a couple were almost instant to within a second or so.

*insert sound of needle scratching across a record*

I just realized the 3xAAA NiMHs I'm using until my 18650s and other stuff from DX arrives (This is day 19 since shipping IIRC) are probably pushing 9-10 years old and while they work in my flashlight the probably don't have the oomph to drive it at full power even when fully charged. I got some 1000mah that I use in my harmony remote that are only about a year or so old. I'm gonna pop them in the charger to top them off while at dinner and give them a try. The diode uses 4.8v which would be more than 3 fully charged NiMH which would be around ~4.2v

One last noob question if you don't mind. When you say check the current draw from the battery what do you mean? My DMM can measure up to 10A DC so should I set it to that and test the batteries?
With boost drivers, current output and current input to the same driver is not the same.

Knowing both makes you able to calculate the efficiency the driver is running at, aproximating the duty cycle and driver heatup from it.

Measure between battery and host.
 
Joined
Sep 22, 2010
Messages
1,358
Points
48
Re: Check my 6x build please!

Just when I thought I knew what I was doing....

I measured from the host to the negative terminal of the battery and got 28 mA which is 110 more than I set the driver to. I wonder if the driver's pot got moved while I was trying to get the leads soldered to the diode or during the couple times I had to test fit the driver into the host. I suppose the next step is to measure across the diode. Guess it was a good thing that the heat shrink FP sent fit so snug I didn't have to heat it to make it stay on the pins.

Still can't get it to burn but I think I need to reposition the module a little further back in the heatsink so I can get the correct focus.

edit: I decided gainst pulling the tubing back and potentially damaging the diode pins so I measured between the heatsink and host and got between .26 and .28A. I assume the fluctuation is because I couldn't clip to the heatsink for a tight connection like I could on the host end. Looks like I'll have to pull the driver out and reset the pot.

i also should have +1'd you sooner for all the assistance you've given me so far. I really do appreciate it!
 
Last edited:
Joined
Feb 5, 2008
Messages
6,252
Points
83
Re: Check my 6x build please!

Just when I thought I knew what I was doing....

I measured from the host to the negative terminal of the battery and got 28 mA which is 110 more than I set the driver to. I wonder if the driver's pot got moved while I was trying to get the leads soldered to the diode or during the couple times I had to test fit the driver into the host. I suppose the next step is to measure across the diode. Guess it was a good thing that the heat shrink FP sent fit so snug I didn't have to heat it to make it stay on the pins.

Still can't get it to burn but I think I need to reposition the module a little further back in the heatsink so I can get the correct focus.

edit: I decided gainst pulling the tubing back and potentially damaging the diode pins so I measured between the heatsink and host and got between .26 and .28A. I assume the fluctuation is because I couldn't clip to the heatsink for a tight connection like I could on the host end. Looks like I'll have to pull the driver out and reset the pot.

i also should have +1'd you sooner for all the assistance you've given me so far. I really do appreciate it!

You have misunderstood me. DON'T DO ANYTHING!!

The current draw from the battery IS supposed to be more than output.
One of homemade boost drivers I made draw 350mA just to output 100mA to PHR bluray diode.

You are doing perfectly fine and measurements are in check.

For burning, please remember you need to "focus" the beam to a pinpoint where it will burn, Your skin test is also in check and sounds normal.

Your mission is a success.

Now, post some pictures of your build!
 
Joined
Sep 22, 2010
Messages
1,358
Points
48
Re: Check my 6x build please!

Excellent. I couldn't figure out what I was doing wrong. It appears nothing after all. :D My problem with stuff like this is I over analyze it when I don't need to

I promise to take some pics tonight so I can get some beam shots. real life got in the way last night (how dare it) or they'd already be up.
 
Joined
Sep 6, 2010
Messages
66
Points
8
Re: Check my 6x build please!

just put together on of these yesterday slight difference in set-up im at 200ma and im using 3 10440's also using a rckstr driver .
your set up sounds right from what i know about the driver your using.

here's a pic
 

Attachments

  • rsz_dscn1350.jpg
    rsz_dscn1350.jpg
    121.8 KB · Views: 240
Joined
Sep 22, 2010
Messages
1,358
Points
48
It's finished!

It's finished and working nicely! Still can't get it to burn but I suspect I need to reposition the module in the heatsink so I can get the proper focus. Guess I'm used to my 1.2W 445 that'll torch about anything.

anyhow here's some pics.


2010-11-13_12-09-00am by ltkernelpanic, on Flickr

I bought two of these hosts from Mohrenberg (link in OP). i didn't think to take a pic of the black one before I started. It's identical to this one except for well it's black not red. :p


2010-11-13_12-07-08am by ltkernelpanic, on Flickr

The pill is plastic and I found if you carefully bend the positive contact up you can remove it. Don't yank too hard because you'll probably pull the switch out with it like I did with the black host. If that happens put the switch back in first then slide the pill back in. I used an knife to cut out part of one of the "ribs" in the pill then a pair of needle nose pliers to pull the rest out. The mini wire dykes I have would have worked nicely had I remembered them. The plastic is very soft and came out easily leaving a nice sized space for your driver. An added bonus is there's nothing for it to short against in there unless your soldering/wiring bridges something.


2010-11-13_12-10-03am by ltkernelpanic, on Flickr

Here you can see the driver tucked away in the pill after removing the rib. By placing the driver in the pill you have plenty of room between the top pf the pill and the heatsink for your wiring. Mohrenberg includes some of FlamingPyros super flexible wire in this kit which is a nice plus. (If you don't already have some of this wire go get some. It is *perfect* for these types of build and a steal at $6 for 20 feet. I got 10' each of black and red.)


2010-11-13_12-10-39am by ltkernelpanic, on Flickr

The heatsink is nice and hefty and even after running the laser for several minutes it didn't feel warm at all. The module is held in place using an included set screw. He also included the needed allen wrench as part of the kit.

Now for some finished shots.


2010-11-13_12-12-19am by ltkernelpanic, on Flickr


2010-11-13_12-11-50am by ltkernelpanic, on Flickr

And of course beam shots. I found it rather ironic that when I try to photograph my 445 it looks really purple most of the time and when I tried to photograph the violet beam it looks blue in the pics.


2010-11-13_12-02-54am by ltkernelpanic, on Flickr

You may have to look at the full sized one on flickr to see the beam. I really need a smoke machine.


2010-11-12_11-55-52pm by ltkernelpanic, on Flickr

A lime green milk crate fluorescing brightly. Too bad I forgot to focus the camera on the crate before taking the shot.
 
Last edited:
Joined
Feb 5, 2008
Messages
6,252
Points
83
Oh you already have a 1.2 W monstruosity :D
Yes I know it's a bit disappointing to assemble 405nm after it , but one must have all lasers!

In any case, your build looks very nicely done.
For burning stuff, you need to "Unthread" or "unscrew" [whatever you prefer :p]the lens out a bit, so your beam will, instead of this:
==
Make this :
><

So you place the unfortunate object into the focal point and enjoy your new laser!

I am just taking pictures of this bluray build I assembled just now, I will take pictures to show you more precisely what I mean.
 
Joined
Jun 19, 2010
Messages
1,487
Points
63
Nice work there LtKernelPanic. It's always better when you make it yourself! Congratulations!
I love my 12x....just focus that lens a bit more. When I took my action shots of 'my lasers' in the multimedia section, the 12x is the hardest to see in the pictures.....it's also the one that burned a whole in my wall at 10 feet :eg:
 
Joined
Sep 22, 2010
Messages
1,358
Points
48
:thanks: for the nice words. I appreciate them.

I have to admit for as much crap as WL has rightfully received over the Arctic Spyder 3 that's what revived my interest in lasers. I had planned on building a 1W 445 based off StyroPyro's tutorial (which lead me) here but not trusting my build skills (a wise choice as it turned out) I ended up buying one of yobresal's excellent builds instead. This build was fun and I have another one planned for the empty host (any guesses as to the color? :eg: ) that's waiting on funding to get a couple flex drives.

I had planned on taking and posting the pics earlier but I couldn't resist finishing my 5-7mw 635 pen build after the last part I needed yesterday afternoon since the custom driver I built for it has been mocking mr for a week. I'll be posting that thread later today over in the reds forum but first I need to do some things around the house that I put off yesterday so I could finish my lasers then try and find the spring from one of my aixiz modules that rolled off my desk last night.


Top